- Published on
Introduction to Apache Airflow: Beginner's Guide
- Authors
- Name
- Anuj Devrani
- @DevraniAnuj

Discover what Airflow offers and a gentle introduction to get started.
Airflow overview
Let's face it we all have used the mighty cron. Its a nifty tool to schedule jobs to run periodically at fixed times, dates, or intervals. But the complexity that comes with it makes it challenging. It fails to have answers to some serious problems like
- What happens when cron fails?
- What will be logged and where?
- How do we notify the owner that something has failed?
Users just want to do things without having to take care of the extra baggage. This is where Airflow comes to help.
Airflow is a workflow orchestration tool. That allows us to author, schedule and monitor workflows at ease. It originated at Airbnb but then it was opensourced, incubated by the Apahe foundation, and now it is a Top-Level Apache project.
It can be used for a variety of ETL related tasks. Such as data movement between systems, Data Lakes, it has also found its uses in complex ML workflows and various other periodic automation tasks. Airflow is written in Python. It allows developers to create workflows that are then executed by the Airflow. The workflows too are written in Python, which allows developers to leverage their existing practices easily.
In this tutorial we will look at a brief intro followed by a simple example to help people get started with Airflow. We will go deeper into airflow in future.
Basic Concepts
Let's first take a quick look on some core concepts that will allow us to use Airflow.
DAG
DAG (Directed Acyclic Graph) is a collection of tasks that we want the Airflow to run. In this case the DAG file is just a configuration file that describes what tasks must be executed, dependency among the tasks, and the configuration for the tasks.
We keep this file as simple as possible and not process things in the file itself, since the airflow scheduler keeps monitoring the file to look for changes.The actual work is done by the tasks defined in the DAGa and they are executed in a different context than the DAG file.
Operators
An operator defines what work is actually done by a task. Each Operator is an independent unit, that means they can exist on their own. If we want to communicate things between operators we have to take care of that.
Airflow supports various operators, most common ones include:
| Operator | Description |
|---|---|
| PythonOperator | Executes a Python Function. |
| EmailOperator | Sends an Email. |
| BashOperator | Executes bash commands. |
| PostgresOperator | Executes SQL commands. Similar operators exists for different databases. |
And there are many more operators written and maintained by the open source community. We can even define operators easily for our custom needs. Operators msut be atomic and idempotent.
Xcom
Xcom allows us to communicate data between tasks. It is suitable when we want to share a small portion of data between tasks. They are stored in Airflow's meta database. XCom can be "pushed" or "pulled" by all TaskInstances.
Tasks
Tasks define the work that needs to be done. They are created by instantiating an Operator. Tasks represent a node in the DAG.
Hooks
Hooks allow Airflow to interface with third party systems. We can use hooks to connect to external services.
Installation
Airflow can be easily installed via Pip. Prior to installing we need to set a variable in our environment AIRFLOW_HOME. This is the location airflow will use to run. Its used to store the config, DAGs and logs for both the DAGs and Scheduler. But we can change the config to our liking.
I will just give a quick way to setup airflow on a dev machine. For more production level and minute config read the official Docs
echo "AIRFLOW_HOME=${PWD}/airflow" >> .bashrc    # Customize as per your prefernce
source .bashrc
Now we can install airflow. Activate the virtual environment and run
pip install apache-airflow
Airflow needs a database to store configuration and manage DAG runs and various other information. But by default it comes with SQLite configured. We will continue with the default configuration but you can read the documentation for setting up the other backends.
Now we have to run to initialize the default values.
airflow initdb
Airflow provides us a Web UI to monitor tasks and DAG Runs. We have to run a scheduler as well that keeps monitoring the directory for new DAGs and DAG updates as well as running the DAGs.
To run the server enter :
airflow webserver -p 8080
Now to run the scheduler :
airflow scheduler
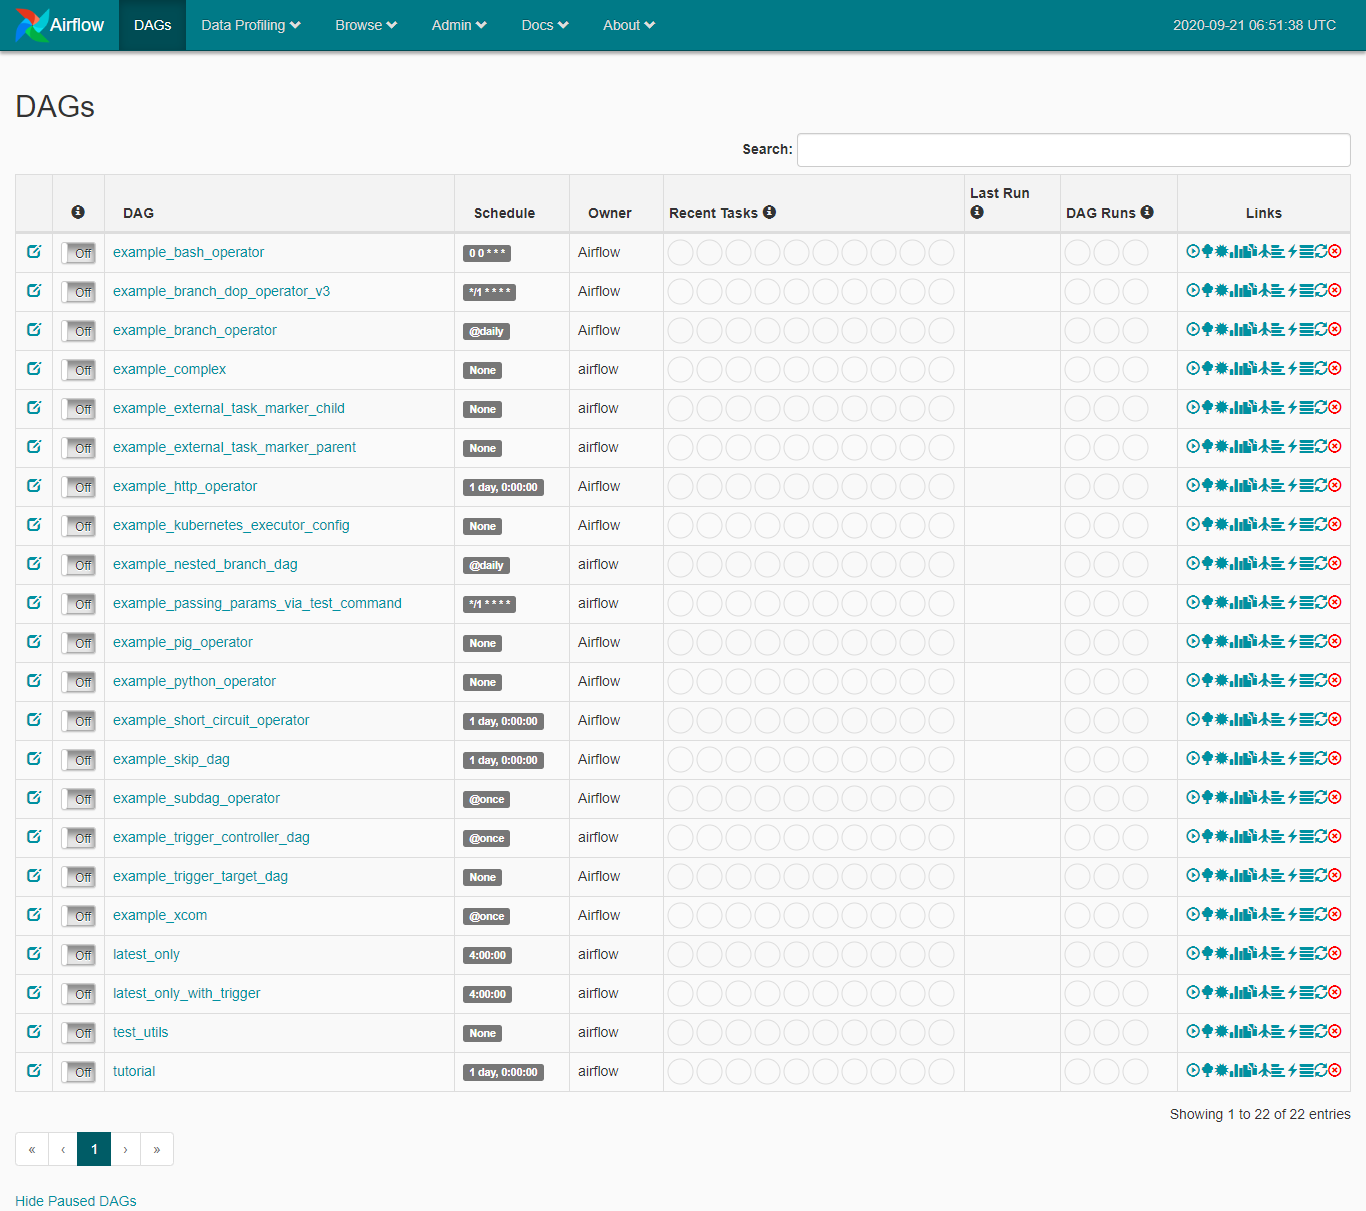
Now go to Airflow on local. You will see a screen like this:

Airflow provides us with some sample DAGs. We can modify the default behaviour by modifying the airflow.cfg. Go to the airflow home directory and modify the airflow.cfg file.
load_examples = False  # Hide sample DAGs.
load_default_connections = False  # Hide sample connections. We will talk about this later.

# Now save the file. And run the following to reset the DB to remove sample DAGs.
airlow resetdb
First DAG
Lets write a simple DAG file and then we can talk more about the UI functions.
from datetime import datetime

from airflow import DAG
from airflow.operators import PythonOperator


DAG_ID = "simple_sample_dag"

default_args = {
    'owner': 'Anuj Devrani',
    'depends_on_past': False,
    'start_date': datetime(2020, 9, 16),
    'email_on_failure': False,
    'email_on_retry': False,
    'retries': 0,
}


def simple_callable(**context):
    print('Hello World')

    context['task_instance'].xcom_push(key='value_passed', value=5)

def second_callable(**context):
    value_passed = context['task_instance'].xcom_pull(key='value_passed')
    print(f'Value Passed was - {value_passed}')

with DAG(
    dag_id=DAG_ID,
    default_args=default_args,
    schedule_interval='@hourly'
) as dag:

    TASK_1 = PythonOperator(
        task_id = 'simple_callable',
        python_callable=simple_callable,
        provide_context=True
    )

    TASK_2 = PythonOperator(
        task_id = 'print_the_passed_value',
        python_callable=second_callable,
        provide_context=True
    )


TASK_1 >> TASK_2
Save the file in the dags folder. Go to airflow admin url, the task will now be listed.

UI Basics
Although Airflow can be fully managed via command line. But for today we will look at basic UI funtions to run our dags.
- First turn the task on by clicking on the OFF button. It will turn ON.

- Now trigger the dag by clicking the trigger icon.

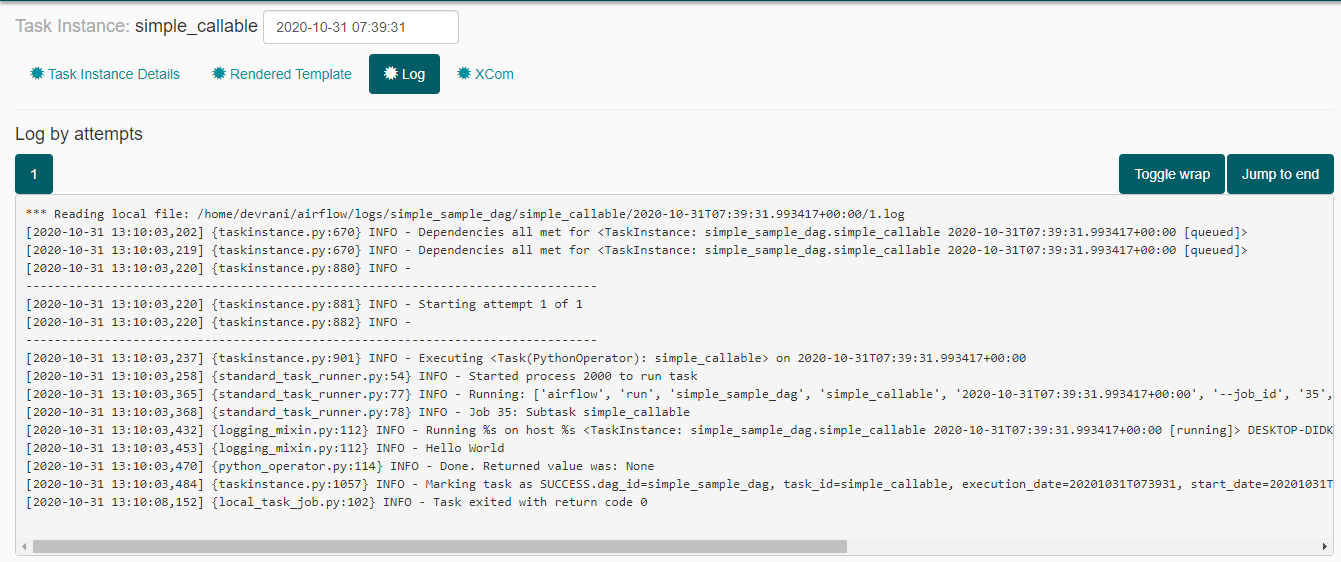
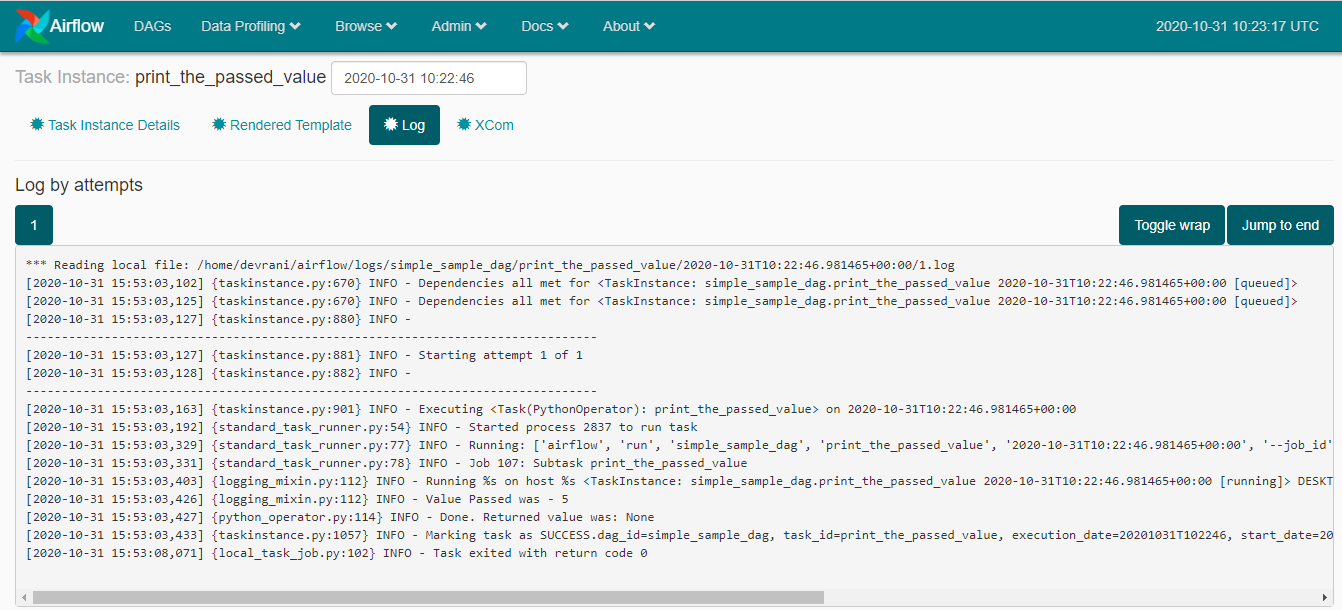
- The Dag will now start processing. Airflow offers a variety of tools on the UI itself. We can see the log for each individual subprocess of the dag as well as the graphical view of the tasks.

The graph shows the live status of the tasks such the state of the task, start time, end time and various other stats. We can refresh the status from the ui itself.
- Click on the individual task to get more details such as logs and other status.


- The homepage shows the DAG's past history about the dag's state.
